If you’ve ever built a wiring assembly by hand, you know how much hinges on one tiny detail: the quality of your connection. A solder lug terminal connector might look simple, but it’s the part that decides whether your circuit works cleanly or gives you trouble the moment the system heats up.
These little metal tabs show up everywhere. Residential wiring, industrial control panels, power supplies, test equipment. If you’ve opened a panel and seen a wire wrapped through a metal eyelet or hooked onto a tab, you’ve met a solder lug terminal. They’ve been around forever because they’re predictable. And safe. And very hard to mess up if you follow a few basics.
So What Exactly is a Solder Lug Terminal Connector?
Think of it as a bridge. The lug provides a flat metal surface or eyelet, and your wire becomes the other half of the connection. The solder joins the two and locks everything in place. That joint becomes the permanent electrical path.
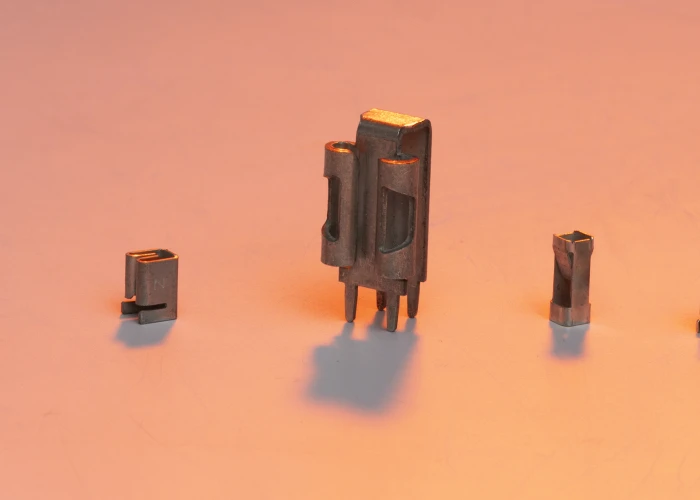
There are a few different styles — ring lugs, flanged lugs, long tabs — but the idea stays the same. Zierick’s 582-Long solder lug terminal is a good example of a design built for tight spaces and clean PCB mounting. The longer leg helps with strain and alignment, especially when your board layout is cramped.
Getting the Installation Right
Good soldering isn’t complicated, but it does demand a little patience. Here’s what helps:
Heat the lug and the wire at the same time. Not the solder. Let the metal do the melting for you. When the lug solder flows naturally into the joint, you get a smooth, solid bond.
Start with clean metal. Oxidation kills connections. A quick wipe with isopropyl alcohol clears away grease and debris.
Don’t flood the joint. A giant blob doesn’t make it stronger. If anything, it hides problems. A good joint looks smooth and shiny with a small concave dip.
Hold still during cooling. Even a tiny shift before the solder sets can weaken the bond. If you need extra hands, use a jig or clamp.
Simple stuff, but skipping any step is where most bad joints come from.
Where Solder Lug Terminals are Used
You’ll find them in:
- Industrial machinery where wires must survive vibration and heat
- Residential fuse boxes or appliance wiring
- Audio equipment and older control boards
- High-reliability circuits where crimping isn’t preferred
Their biggest advantage is stability. When you solder a lug correctly, that connection will outlive the device it’s inside.
Material Choices and Ratings
Lugs are usually made from copper, brass, or tin-plated alloys. The plating protects against oxidation and keeps resistance stable over time.
Before choosing any solder lug terminal connector, check:
- The wire gauge it supports
- Its temperature rating
- Its current rating
- Any environmental requirements (moisture, heat, vibration)
A mismatch here is where overheating and premature failure begin.
Troubleshooting Common Problems
If a terminal lug connection gives you trouble, it’s usually one of these:
Cold joint. Dull, grainy solder. Caused by heating the solder directly rather than the metal.
Frayed wire strands. These reduce contact area and can trap flux. Trim and re-tin the lead.
Overheating. If the insulation is scorched or the lug discolors, the joint pulled too much heat. Move faster next time or adjust your iron’s temperature.
Loose mechanical fit. Sometimes the problem isn’t the solder, it’s the lug. Check that the connector is anchored properly before soldering.
Good lug soldering is part technique, part attention, and part choosing the right hardware. If you need terminals built to stay stable under real-world stress, take a look at Zierick’s 582-Long solder lug terminal. It’s designed for secure mounting, clean soldering, and long life in demanding assemblies.